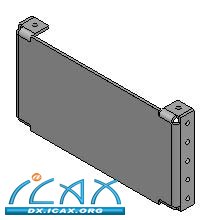
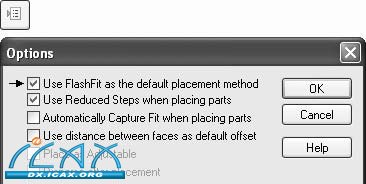
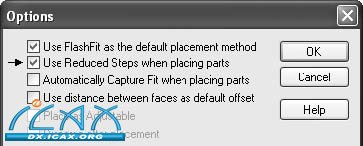
概述 装配一个包括多个钣金件的外壳。该钣金件包含将用于对齐和定位零件的孔阵列和面。 课程目标 使用C:/Fundamentals/Parts文件夹下Parts Library(零件库)中的现有零件构造一个装配件。本次练习可帮助您熟悉用于构造完全约束装配件的装配关系。 本次练习将通过一定量的重复操作巩固装配设计过程知识。 其中使用了最常用的装配关系:贴合、面对齐、轴对齐和偏置距离。 本次联系阐述如何: • 通过从Parts Library(零件库)拖放的方式在装配文件中放置零件 • 通过应用装配关系在装配件中定位零件 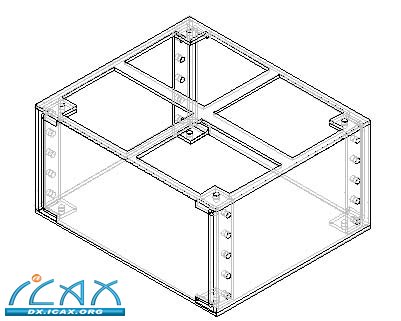 练习 第1步:新建一个传统ISO 装配文件,查找包含构造装配件时所需组件的Parts Library(零件库)。 新建一个传统ISO装配文件。 在PathFinder(路径查找器)中点击Parts Library(零件库)选项卡。 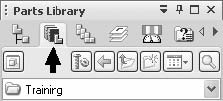 确保Parts Library(零件库)中显示培训文件。如有必要,使用PathFinder(路径查找器)中Parts Library(零件库)选项卡上的Look In(浏览)下拉菜单查找培训文件所在的文件夹。  可使用Views(视图)按钮控制Parts Library(零件库)中的文件夹内容的显示方式。 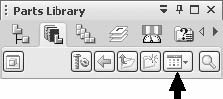 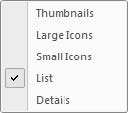 下图显示了List(列表)选项。  点击Application(应用程序)按钮,然后点击Solid Edge Options(Solid Edge选项)。点击Assembly(装配)选项卡下图显示了默认设置。确保设置匹配,然后点击OK(确定)。 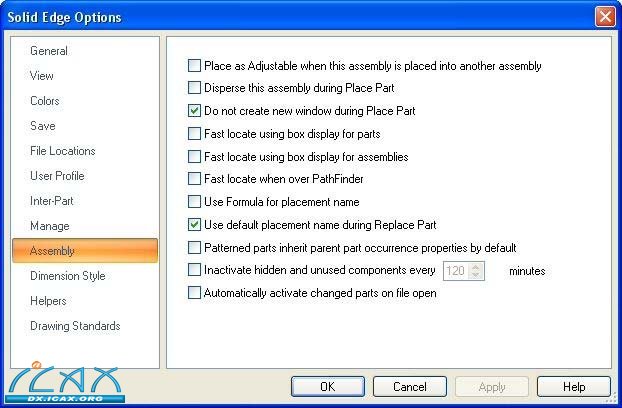 第2步:放置和定位装配件中的第一个组件。 从零件文件中选择long_side.psm。
|